Showing posts with label recipes. Show all posts

Tuesday, March 8, 2022

Hearty Chili With a Twist

I'm not a very fancy cook and tend to stick to the basics since I'm just cooking for myself.   You won't find anything Pinterest-worthy coming out of my kitchen!  That said, lately I've found myself playing with things a little more, introducing different foods into the basic fare that I normally make.

Beans, beans, and more beans
Today's experiment happened to be chili.  My usual take on chili is a couple of cans of kidney beans, onion, garlic, tomato sauce, tomato paste, ground beef, chili powder, hot sauce, salt, pepper, etc. 

Looking in my pantry, I saw more cans of garbanzo beans that I really need, so decided to switch things up a bit and use some in my chili.  And what's this?  A can of pinto beans?  Since we're thinking outside of the box, why not throw that in too!  

I had no ground beef in my freezer, but I had cooked up a full package of mild Italian sausage the other day and there was plenty left, so they were chopped and added to the mix as well.

Yellow sweet peppers and mushrooms were spotted in the fridge, and since this chili is turning out to be on the unconventional side anyway, into the pot they went.

Finished product

It sure smells good, and I'm fixin' to sit down and enjoy this bowl.  I'll report back later with how it turned out.

Do you follow specific recipes, or tend to wing it like I do?  


~ Marie Anne


Here's what went into the pot:


  • 2 cans of garbanzo beans (chick peas)
  • 1 can of dark red kidney beans
  • 1 can of pinto beans
  • 2 small cans of tomato sauce
  • 1 can of tomato paste
  • 3-4 links of mild Italian sausage, chopped
  • 1-2 tsp minced garlic
  • 2 small yellow sweet peppers, chopped
  • 2 medium button mushrooms, chopped
  • Chili powder, hot sauce, salt, pepper, etc
  • Topped with cheddar cheese, shredded


Thursday, October 29, 2020

Breaking out and trying new things

Thursday morning at MA's house started off with black tea, a 1.6 mi barefoot walk, then my usual smoothie (I forgot my hard boiled egg ... oops!).

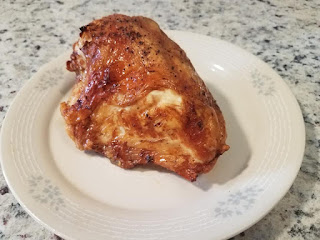
I mentioned in an earlier post that I bought a mini air fryer and that I was loving it so far.  This morning I picked up a couple of chicken breasts (with rib meat and skin on) and threw one in the fryer to fix for lunch.  I just added a little seasoning (no breading or oil) and let 'er rip.  It came out amazing!  I ate several bites of it as soon as it cooled enough, and just threw the other one in the fryer and will use it and the rest of the first one for homemade chicken soup (after I eat that yummy, crunchy skin) .  I'm fixing a small salad to round out lunch.


I don't put noodles or potatoes in my soup (those carbs, ya know?), but onion, broccoli, cauliflower, and maybe a small amount of carrots usually make it into the pot, along with the chicken, my own bone broth, and some Better Than Bouillon. As I was cruising the produce aisle this morning trying to think of something different I could add, the bok choy spoke to me.  Mind you, I've never cooked or even tasted bok choy in all of my 63 years (not knowingly, anyway), but I thought it looked pretty, so into the cart it went.  As soon as I'm done typing this post, some of it will be chopped up and added to the soup, which is already simmering for tonight's dinner.  I've got some pretty red, orange, and green peppers to brighten it up too.  I'm making a good sized pot, so it will carry me through several more meals.

I need to get out and rake leaves, but it's windy today, so I might wait until more of them have fallen and just do it once.  Maybe I'll get to them tomorrow since it's an off day as I'm meeting a couple of Team RWB comrades Saturday morning for a walk/ruck/run/whatever, and I don't know how far we'll end up going.  I'm learning that taking a break and not working out every day is better for me, and probably you too, and I'll expound on that another time.

So what will I fill up the rest of my Thursday with?  An exciting load of laundry, and likely TV and crochet.  

I hope your day is blessed!

~ Marie Anne


Sunday, May 20, 2018

Do I Need to Drain Cucumbers?

Because of their high water content, cucumbers are a great low-calorie vegetable to include in side dishes or eat as a healthy snack.  That same water can wreak havoc in a recipe, however.  So should you drain your cucumbers before you use them?  In depends on what you're using them for, and how quickly they will be eaten.

If you're going to just slice and eat your cucumbers as-is without adding anything else to them other than salt and pepper or vinegar, or tossing on top of a green salad that will be eaten quickly, then do just that - slice and eat.  Since they won't be sitting in any other ingredients that will get soggy from the extra water, there's no harm to be done.

If, however, you will be making a cucumber salad or anything where they will be combined with other ingredients in a sauce or dressing of any kind, you might want to drain them first.  If the dish won't be eaten within an hour or so, the water content of the cucumbers will drastically change the consistency of the dressing, making it appear curdled, or at least watered down.  It's not something I would find appealing, and certainly wouldn't want that unwelcome surprise if serving guests.  Cucumber sandwiches will also get soggy quickly, as the bread would soak up the water, so make sure to drain first before making finger sandwiches, or your appetizers won't be very appetizing.

So how do you drain cucumbers?  It's very simple.  Peel (if desired) and slice your cucumbers, then layer the slices in a colander, sprinkle salt over them, and let them sit.  You won't see the water come pouring out from the cucumber like you would when emptying a can of vegetables, but it will drain slowly - 20 to 30 minutes should be sufficient.  When done, you can layer the slices on a sheet of paper towels and pat lightly if you want.

Will adding salt to the cucumber alter the dish you're preparing?  Not significantly.  Most of the salt will drain out with the water, but I always taste-test as I'm cooking, so would know whether my cucumber salad needed less salt than usual.

Draining cucumbers does take a few minutes, but the process itself couldn't be easier.  If you set them up to drain while fixing the rest of your meal, it won't add any prep time at all other than the minute to peel and slice.

~ Marie Anne

Tuesday, May 15, 2018

MA's Cucumber Salad

Courtesy of Group-Ethnographies
I'm not much of a pickle eater, (except sweet gherkins), but I love cucumbers, especially when made into a cucumber salad.  I fell in love with this concoction a number of years ago when my former mother-in-law made it, and it quickly became a staple in my own home.    I probably don't make it exactly as she did, but her two sons who often ate it at my house swore that my version was better than their own mother's.  I don't know if that's true or not, but they couldn't get enough of it, often fighting over the last slices in the bowl, and I wasn't going to argue with them.

I'm no gourmet cook and don't measure things when I throw them together, so I'll give you the list of ingredients, and you can probably wing it as good as I can from there.

Sour cream
Mayonaise
Miracle Whip (generic is fine)
Cucumbers
Onion
Vinegar
Salt and pepper
Sugar

To make it, simply -

Combine sour cream, mayonnaise, and Miracle Whip in a medium sized bowl in approximately equal amounts.  (Even if you hate Miracle Whip, trust me, mixed with the rest of the ingredients, it makes this dish).  I use the largest spoon in my silverware drawer and start with one heaping spoonful of each, then add more depending on how many/how large a cucumber I'll be adding.

Stir together until smooth (a wire whisk is handy at this point), then pour in just a tablespoon or two of vinegar.  Cut onion into chunks and add that to the bowl, then a pinch or two of sugar, just enough to offset the vinegar, but not make it too sweet.  Top off with salt and pepper to taste, and maybe garlic salt or whatever other seasonings you might like.

Peel a cucumber and cut in half, then into quarters, then into chunks.  (I like to cut mine into slightly thicker chunks rather than slicing thinly so that it doesn't get soggy too quickly).  Add the cucumber to the prepared dressing and toss to cover completely.  Serve immediately, or chill slightly to serve no more than an hour or two later.

If I'm making this for myself, I only use half of a large cucumber at a time, as leaving the cucumber to sit in the dressing for more than a few hours will water it down and make it soggy or appear curdled.  (Cucumbers have a very high water content which will break down the rest of the ingredients the longer it sits.  To combat that, you can drain the cucumbers first).  I'll eat half the cucumber, then cover the dressing and refrigerate to use for the other half the next day.  Leftover dressing will keep for at least 2-3 days in the fridge, so I add another dab of each ingredient if necessary to give me enough to cover the second piece of cucumber.

If you want to make this salad ahead but don't want to drain the cucumbers, make the dressing first and add the cucumber shortly before serving.

This is another of those foods that I think tastes better with onions in it, but I don't actually eat the onion (I don't mind onion flavor, but can't stand biting into one ... ick).  If you don't like onions either, try it anyway; I don't think this cucumber salad is as good without it.  Also, I don't like tomatoes, but my brother-in-law loved chopped tomatoes along with the cucumber in his.  The red 'maters added a nice pop of color to the dish too.

This is a quick throw-together side dish that can round out most any meal.  If you don't mind eating the peel on a cucumber, you can save a few seconds more by not peeling it first.  Play with this and tweak the ingredients to suit your own taste.  I'm sure it'll be a hit at your house too.

~ Marie Anne

Thursday, May 10, 2018

Do You Waste Money Throwing Vegetables Away?

Spoiled vegetables tossed in the trash - I know I don't have the market on this wasteful behavior.  I have the best of intentions when I go to the grocery store and buy vegetables, yet often still end up throwing some away ... and I'm ashamed to admit that sometimes more gets tossed than eaten.  What a waste!

I'm getting better, though.  One thing that really helps me is to cut up the vegetables when I get home so they're handy to throw into a meal or grab a quick snack.  It only takes a minute or two, and I have a really big glass bowl with lid that will hold a whole head of chopped cauliflower and bunch of broccoli crowns.
I often make a 2-egg omelet of sorts for breakfast, and it's easy to grab a hunk of cauliflower and broccoli to chop into smaller pieces and scatter over the eggs as they cook, usually adding a chopped mushroom and bit of shredded cheddar cheese.  Yum!   The chopped vegetables also make it easier to toss into a stir-fry dish, making a healthy, tasty meal in minutes if you have pre-cooked chicken or beef on hand.

Watching TV and craving something crunchy?  Your bowl of chopped veggies will be sitting there, all ready and waiting.  Drizzle a little salad dressing over a small bowl of vegetables, or fix an easy dip with sour cream and herbs and spices.  It's a healthy way to get your crunch on without the carbs and processed junk in chips, pretzels, or popcorn.

If things are a bit crazy when you get home with the groceries, at least try to get the vegetables cut up before you go to bed that night.  Do it often enough and it will become a habit - a healthy one that you won't mind your kids picking up.

~ Marie Anne
 

Wednesday, January 13, 2016

Whole30 Compliant Applesauce Salad Dressing - For More Than Just Salads

Applesauce Salad Dressing
© Marie Anne St. Jean
I love to eat a big green lettuce salad with button mushrooms, sharp cheddar cheese, and apple chunks, and usually had it with ranch dressing.  Since starting Whole30, I can't have the cheese, and I can't have my usual dressing. What to do?  I had almost two full heads of lettuce in the fridge that I didn't want to waste, and really needed it to add another vegetable to my rotation. I tried making a compliant Dump Ranch dressing and it didn't come out very well, or at least I didn't care for it. I thought it to be very bland, and almost bitter, and I needed something a little sweeter to dress my salad.

Realizing that unsweetened apple sauce is compliant on the Whole30 plan, I wondered if I could somehow use it to make a dressing that would satisfy me?  Apple chunks in my salad were sweet, so perhaps an applesauce dressing would do the trick.  Off to the interwebz to search!

I found this recipe for Awesome Applesauce Salad Dressing that looked pretty good, so decided to give it a shot.  I didn't have mint leaves, but didn't see where that would be a big deal.  The first time I made this, I couldn't get my jar of minced garlic open, so I substituted a compliant garlic powder instead, and it was fine.  I did use the minced garlic from a jar the other times I've made it, and it's amazing.  Dried basil got tossed into the mix instead of fresh, but it still worked.

After mixing the ingredients in the amounts listed, I found the apple cider vinegar to be a bit overpowering, so I added more applesauce, a little at a time, until I settled on a taste that was palatable to me.  If I had to guess, I'd say I ended up with more like 1/2 cup of unsweetened applesauce, but stayed with the amounts listed in the original recipe for the other liquid ingredients.  I also used my new stick immersion blender instead of dragging out the big one, and it worked fine.  Super easy cleanup? Bonus!

Since I couldn't wait to see how it worked on an actual green salad, I filled my bowl with torn iceberg lettuce and sliced a couple of good sized button mushrooms on top.  I decided to omit my usual apple chunks since I was using the applesauce dressing.

The verdict?  I loved it!  No, it wasn't the same as my apple and cheese-topped salad, but it was Whole30 compliant, and it was good.  I don't like tomatoes, so just the lettuce and mushrooms was fine with me, but you could add just about anything else you wanted to this and I'm sure the applesauce dressing would be just as tasty.   It still had a bit of a punch with the apple cider vinegar, but not so much as to make you pucker up.  I would imagine if you like any sort of vinaigrette, you would enjoy this applesauce dressing too.

As I dished out the rest of my meal, I had an a-ha moment.  What would the applesauce dressing taste like on my chicken breast and red potatoes?  Only one way to find out!  I drizzled the dressing lightly over the chicken and potatoes and put it in the microwave for just a few seconds so that the dressing wouldn't chill the rest, and called it good.

Chicken/veggie mix with applesauce dressing
© Marie Anne St. Jean
The whole thing was delicious!  I enjoyed it so much that I poured it over breakfast this morning too (which consisted of the leftover chicken, a couple of cubes of sweet potato, and some steamed broccoli ... who said breakfast had to be eggs?)

This applesauce salad dressing will be a staple in my kitchen for sure.  The majority of my meals end up being a mix and match stir-fry kinda thing from whatever I have in the fridge, and I think it will be tasty over both beef or pork as well as chicken, and most any vegetable.  I don't think I'll try it over eggs, but the boiled shrimp I'll be fixing in the next day or two will definitely get a drenching.

Since there is a good amount of olive oil in this dressing, it should count as a fat if I use enough of it over my meal, which is also a bonus for me.  I struggle with getting enough fat from regular foods, and didn't want to rely on my homemade clarified butter for every meal.

If you try my version of applesauce salad dressing, please let me know what you think!  I'd love to hear how it works out for others.

~ Marie Anne

Updating:  I've been using this applesauce salad dressing on EVERYTHING!  If I'm working out in the morning, I chop a hard boiled egg and add a little of this dressing and that gives me the little bit of protein and fat before I get on the treadmill.  I use it on salads (of course), and just about any meat and vegetables that I throw in the skillet to stir fry or make a hash, this applesauce salad dressing goes on top after I dish it up.  Since apples go well with pork, this dressing makes an AWESOME-SAUCE (see what I did there?) to go on pork chops as well.


Thursday, January 7, 2016

Ghee, it's not so hard to make after all!

My biggest problem with the Whole30 program is still getting enough fat into my meals.  Sounds like a good problem to have, right?  But it's not.  I need GOOD fat, and there's only so much olive oil and coconut milk I can handle.  It's easy to add nuts to the mix and get the fat in there, but you're supposed to use nuts sparingly on the Whole30 plan, and I've been trying to stick to that.  I knew I needed butter to put on my potatoes and other vegetables, so that meant making my own ghee (also called clarified butter).

I'd have made it earlier this week when I started the plan, but I didn't have anything to strain the milk solids out of the butter with.  They say you can use cheesecloth, but I didn't have any, so I ordered some nut milk bags from amazon and they came in today.  I couldn't wait to rip open the box and put them to use.  I needed my ghee!

© Marie Anne St. Jean

The Whole30 book says to cube four sticks of butter, but I didn't see where it would make any difference how much you used because you're just melting the butter by itself, not adding anything else where a ratio of one ingredient to another might matter.  Not wanting to waste a whole pound of butter if I messed it up somehow, I decided to start with just two sticks.

So... here's how to make your own ghee.

Simply cut the butter into chunks and put into a small saucepan and melt it on medium/low heat, and don't stir it.  Once it melts down and starts simmering, white stuff will float to the top - that's the milk solids that you DON'T want, as they're not Whole30 compliant.

© Marie Anne St. Jean

After it's simmered for a bit, take a spoon and skim the white stuff off the top of the melted butter and discard it.  That should get rid of most of the milk solids, but you'll still need to strain it good to make sure you got it all.

© Marie Anne St. Jean

My nut milk bags were kinda stiff, so I had to think about how best to approach this step of the process.  I decided to try putting the empty bowl to catch the butter inside the nut milk bag and pour it through that way.  It was a bit tricky as it wanted to roll around on top of and off the side of the bag, but as soon as I poured it on top, I lightly pressed a spoon down over the bag to make a slight indentation, so that it would flow through that spot over the bowl.

© Marie Anne St. Jean

It might not have been the best solution, but it worked.  As fine a mesh as the bag was, it didn't seem like it caught much of anything, so I drained it through a second time.  It still didn't catch much, so I guess I must have done a good job when I first spooned out the solids.

After straining, I poured it into a glass measuring cup to make pouring easier, and put it into a large baby food jar to cool.  The two sticks of butter that I started with yielded slightly more than the baby food jar full.  I still needed to make something for dinner, so I used what little was left in the measuring cup, so I didn't need to scramble to find another jar.

Here's the clarified butter just after taking off the stove -

© Marie Anne St. Jean


And after it settled for just a few minutes.  You can see at the bottom of the jar that it's already starting to solidify.
© Marie Anne St. Jean

After more cooling and settling, into the fridge it goes, ready to add to my next meal!

© Marie Anne St. Jean

It really is as easy as that.
  • Cut butter into chunks
  • Melt and simmer slowly until white stuff appears
  • Skim white stuff and discard
  • Strain to get rid of more white stuff
  • Pour into glass jar
  • Allow to cool, then refrigerate

I'm so happy that it's such a simple process, because I doubt I'd make it the full 30 days of the Whole30 without it.  This solves a huge problem for me, and I can't wait to try ghee on my breakfast veggies in the morning!

~ Marie Anne

Tuesday, January 5, 2016

Dump Ranch Dressing, First Attempt

My stick blender arrived this morning so I immediately grabbed what I needed to make Dump Ranch dressing.  Without it, I've been having a hard time finding the fat required with my meals when following Whole30 so I've been anxious to try it.  This Dump Ranch recipe uses olive oil and coconut milk, both compliant fats on Whole30, so if I use this in salad or as a sauce over vegetables, I'll meet my fat requirements easily.

I didn't have everything on the ingredient list, so I modified mine just a bit.  I didn't have red wine vinegar and was afraid regular red cooking wine wouldn't be compliant, so I just omitted that.  My herbs were limited, so I just added what I had - a little oregano and basil.  The garlic and onion salts that I have on hand aren't compliant (both have other fillers in them - ugh), so I went with just salt and pepper, and a little chopped garlic.  Sigh - more things I'll have to add to my ever-growing shopping list.

My immersion blender didn't fit down into the neck of the jar that I had planned on storing the Dump Ranch in, so I used a large glass measuring cup, then poured the results into my jar when done.  No biggie, just means I had one extra thing to wash.  I chunked everything into the measuring cup and commenced to blending.  Everything whipped up just fine and looked great, so I did a taste test by dunking my finger in it.

Hmm ... kinda bland.  I added a little more garlic then grabbed an onion and cut a very small chunk, minced it, and tossed that in too.  Tasted again; still needed something.  Added more salt and pepper, and then it ended up too salty.  I poured just a tad more coconut milk into the mix and called it good.  It's not the tastiest thing I've ever made, but poured over other foods, it'll be fine. It'll sure beat the coconut  milk I added to my tea this morning.

I do miss the sweetness of a store-bought dressing, but maybe the red wine vinegar will help with that.  I probably won't miss it as much in my salad because I add apple to that, which will add quite a bit of sweetness.

All in all, I feel I've realized a modicum of success in my first attempt at making Dump Ranch dressing.  I expect I'll be experimenting with this basic recipe as I go along and will be sure to write about my successes (and failures).  I've never used fresh herbs much, but plan on seeing what I can find locally.  Maybe I'll even try growing my own.

Veggies will be on my plate with lunch, and salad is on the  menu with dinner tonight, and I can't wait to try this!

~ Marie Anne

Whole30 R1D1 Done!

Woo-hoo!  I completed Round 1, Day 1 of the Whole30 program, and lived to tell about it!  It wasn't nearly as bad as I expected it to be.  I've done the (extreme) low-carb thing in the past and the first few days were pretty rough, but I didn't have any major issues yesterday at all.  My biggest fear was that I'd run out of energy, and I had a fitness goal to meet.  Thankfully, that never materialized.  I got two decent treadmill sessions in and logged a total of 83 active minutes, and managed to get almost 15,000 steps (6.2 miles) in before the day was done.  Go me!  I didn't feel overly tired or hungry at all, which really surprised me.  I know that can change drastically as I move forward with the program, but I'm ok with it.  I know this is where I'm meant to be right now, so I'm going to see it through.

I'm anxious to get my stick blender in today so that I can make some dump dressing and mayonnaise that I can use as my fat on vegetables and such.  Right now I'm struggling to get enough fat in my meals because I don't have the means to make my own ghee (clarified butter) yet either (my nutbags to strain the milk fat out of the butter will be here tomorrow, I think).  I'm using coconut milk and olive oil where I can, but don't really care for the taste of either of them plain, so I'm using them sparingly.  I've added a few nuts (pistachios, almonds, or walnuts) to round out my meals if I feel I haven't added enough fat elsewhere.  Nuts are supposed to be eaten in moderation, but are ok here and there, but I want to avoid using them as a crutch.

Breakfast this morning was a small hamburger patty fried in a little of the fatty solid of coconut milk, a two-egg omelet (frittata?) with a bit more coconut milk, fresh mushroom, and broccoli.  Extra broccoli on the side, a few almonds, and half of a fresh pear completed the meal, washed down by a cup of tea with a splash of coconut milk (which I don't care for, but wasn't really spit-it-out gross, so I'll suck it up).


The photo isn't pinterest-worthy, 
but the meal was tummy-worthy!
© Marie Anne St. Jean


I made country style pork ribs with roasted red potatoes yesterday for dinner, both with drizzled olive oil and chopped garlic, and there's enough left for at least one more meal, maybe two, accompanied by another vegetable, so the rest of today's fare will be a little easier to put together.  I'm going to try to do as much prep ahead of time as I can, especially cooking meat that will last for a few meals.  I can throw white or sweet potatoes in the oven at the same time, and that will help too.

So ... R1D1 is in the can, and I'm ready for day two food-wise, and will hit the treadmill for my first session shortly to take care of the fitness end of things.

~ Marie Anne

Wednesday, February 26, 2014

Coconut Flour Lemon Bread Recipe – First Attempt

Finished Coconut Flour Lemon Bread
©Marie Anne St. Jean

I’m still trying to get back on the low-carb bandwagon, and have been researching alternatives to baking with white or wheat flower.  I found organic coconut flour at my local Mennonite/Amish market, so thought I’d give that a try.  I don’t know how coconut flour compares to regular flour in carb count, but it is gluten free and likely better for me in that regard, so I figured I’d give it a try.  Paleo is another new dietary regimen buzz word, and I guess coconut flour fits into that program also.

I’ve never used coconut flour (or any flour other than made from wheat), so I did a little research first to see how it compares to white flour when baking.  I’m glad I did, because I found that it reacts so much differently than regular flour, and requires more liquid than you would think.   I searched for bread recipes with coconut flour and found several, and they took between 6 and a full dozen eggs – yikes!  Most called for a sugar substitute as the sweetener, with some giving directions for using white sugar, but I decided to try honey instead and added a little lemon juice to liven things up a bit, thinking since honey is more liquid than sugar, I could use less eggs.

I think what I came up with worked out great.  Coconut flour isn’t going to give you a real bakery bread-like texture, but will result in something more akin to cornbread.  Think of it as banana bread without the bananas – it’s not sweet, but not like ‘real’ bread either. This isn’t something you can make sandwiches with, but it’ll taste good with a pot of beans, or with a little butter and honey or jam with your morning coffee or tea.

Since the trick to working with coconut flour is getting the ratio of flour to liquid correct, I was surprised that I nailed it on the first try.  Here’s my recipe, followed by notes of what I might change next time:

Ingredients for Coconut Flour Lemon Bread

¾ cup coconut flour
1 tsp baking powder
½ tsp sea salt
5 eggs
½ cup butter (1 stick), softened
1/3 cup honey
1 tbls lemon juice

Sift together coconut flour, baking powder, and sea salt in a bowl.

Mix together eggs, butter, and honey in separate bowl until well blended.  (If the butter is lumpy, use a mixer on low for a minute or so, and break up lumps as much as possible).

Add sifted dry ingredients to egg mixture and mix well by hand (a heavy spatula worked well for me), adding lemon juice.  Batter will be thicker and less liquid than cake batter, but not as stiff as cookie batter (it will resemble cornbread batter at this point).

Spoon mixture into a greased loaf pan (it doesn't pour well) and bake at 350* for 40 minutes.  Turn out onto wire rack to cool.

Mixture will resemble cornbread dough
©Marie Anne St. Jean

Notes: 

- I wasn’t sure how much honey would be needed as a sweetener, so I started with approximately 1/3 cup, but don’t think the result was quite sweet enough.  I’ll probably increase to ½ cup when I make this again.

- I also wasn’t sure how much lemon juice I should add, so I started with 1 tablespoon.  I didn’t really get the lemony flavor I desired, so will increase to 2 tablespoons the next time I make this recipe.

- Since bread made with coconut flour doesn’t really rise, it looked pretty skimpy in the loaf pan.  I think I’ll try using smaller loaf pans next time.  I might also increase the coconut flour to a full cup and add an extra egg, and increase the amount of honey and lemon by a small amount if using a regular sized loaf pan again.


Fresh out of the oven
©Marie Anne St. Jean

If you make coconut lemon bread using this recipe, please let me know how it turns out, and whether you tried any of the changes that I suggested.  I've already eaten half of this first loaf this afternoon, so I'll undoubtedly be trying the new variations soon, and will post my results again.

Now that I've tried coconut flour, I think I'll try making my own almond flour and see what I can do with that.

~ Marie Anne


(Yes, you can even buy organic coconut flour through amazon.com)


Sunday, February 2, 2014

Another Low-Carb Trick - Cabbage for Lasagna Noodles

Photo by Eirik Newth
I made a post the other day about low-carb pizza crust made with cauliflower, and mentioned that now I needed to find a substitute for pasta.  Well Tay must have heard me, because she came up with a recipe to use cabbage in place of lasagna noodles.   I don't see how cabbage could work as a replacement for regular spaghetti, but lasagna works for me!

Her recipe doesn't include meat, but I would definitely add a layer of ground beef and sausage to make this more like a true lasagna.  I like my lasagna to have a thick layer of meat and honestly, the lasagna noodles are secondary to the meat and cheese, in my opinion.  Since both meat and cheese are ok to use while following a low-carb diet, I'm definitely putting this on my list to try soon.  I don't buy cabbage often, but I have a half head left from dinner the other night, but not sure I have any ground beef on hand, so it still might have to wait a few days.

I wonder how it would work with a layer of cauliflower in place of the lasagna noodles?  I'll give that a try too and report back!

What's your favorite part of homemade lasagna?

~ Marie Anne

Friday, January 31, 2014

Low Carb Cauliflower Pizza Crust

Photo courtesy of Taylor Rios
I fell off the wagon so hard that I hurt myself, and it's been a struggle to get back on.  I really need to buckle down and do the low-carb thing again, as it's the only thing that works for me since I have a true carb addiction.  Some of the things I really miss when following a low-carb diet are bread, pasta, and pizza.  My friend Tay has come up with a low carb pizza crust made from cauliflower, so this might be just the thing to encourage me to keep at it.

It doesn't take many ingredients, but I'll have to remember to keep grated parmesan cheese on hand as I don't use that too often.  I haven't actually tried the cauliflower pizza crust yet, but I have done mashed cauliflower in place of mashed potatoes and like that just fine, so I'm pretty sure I can take Tay's word on this one.

If you try out her recipe, please let me know how you liked it.

Now to find a good substitute for pasta ... still working on that one!

~ Marie Anne